Periwinkle Block Tutorial
I am loving this old quilt block. The Periwinkle quilt (or humming bird, snowball or crazy star) quilt has been around since the 1930s. It is often seen made with feedsack fabric. I have seen it done many different ways on a larger scale, but I wanted to shrink it down a bit and I wanted a project to work on by hand. There are a couple steps you need to knock out before you can sit with a cup of tea and a show, but if you chain piece a bunch of them it really goes quite quickly. Read on for more!
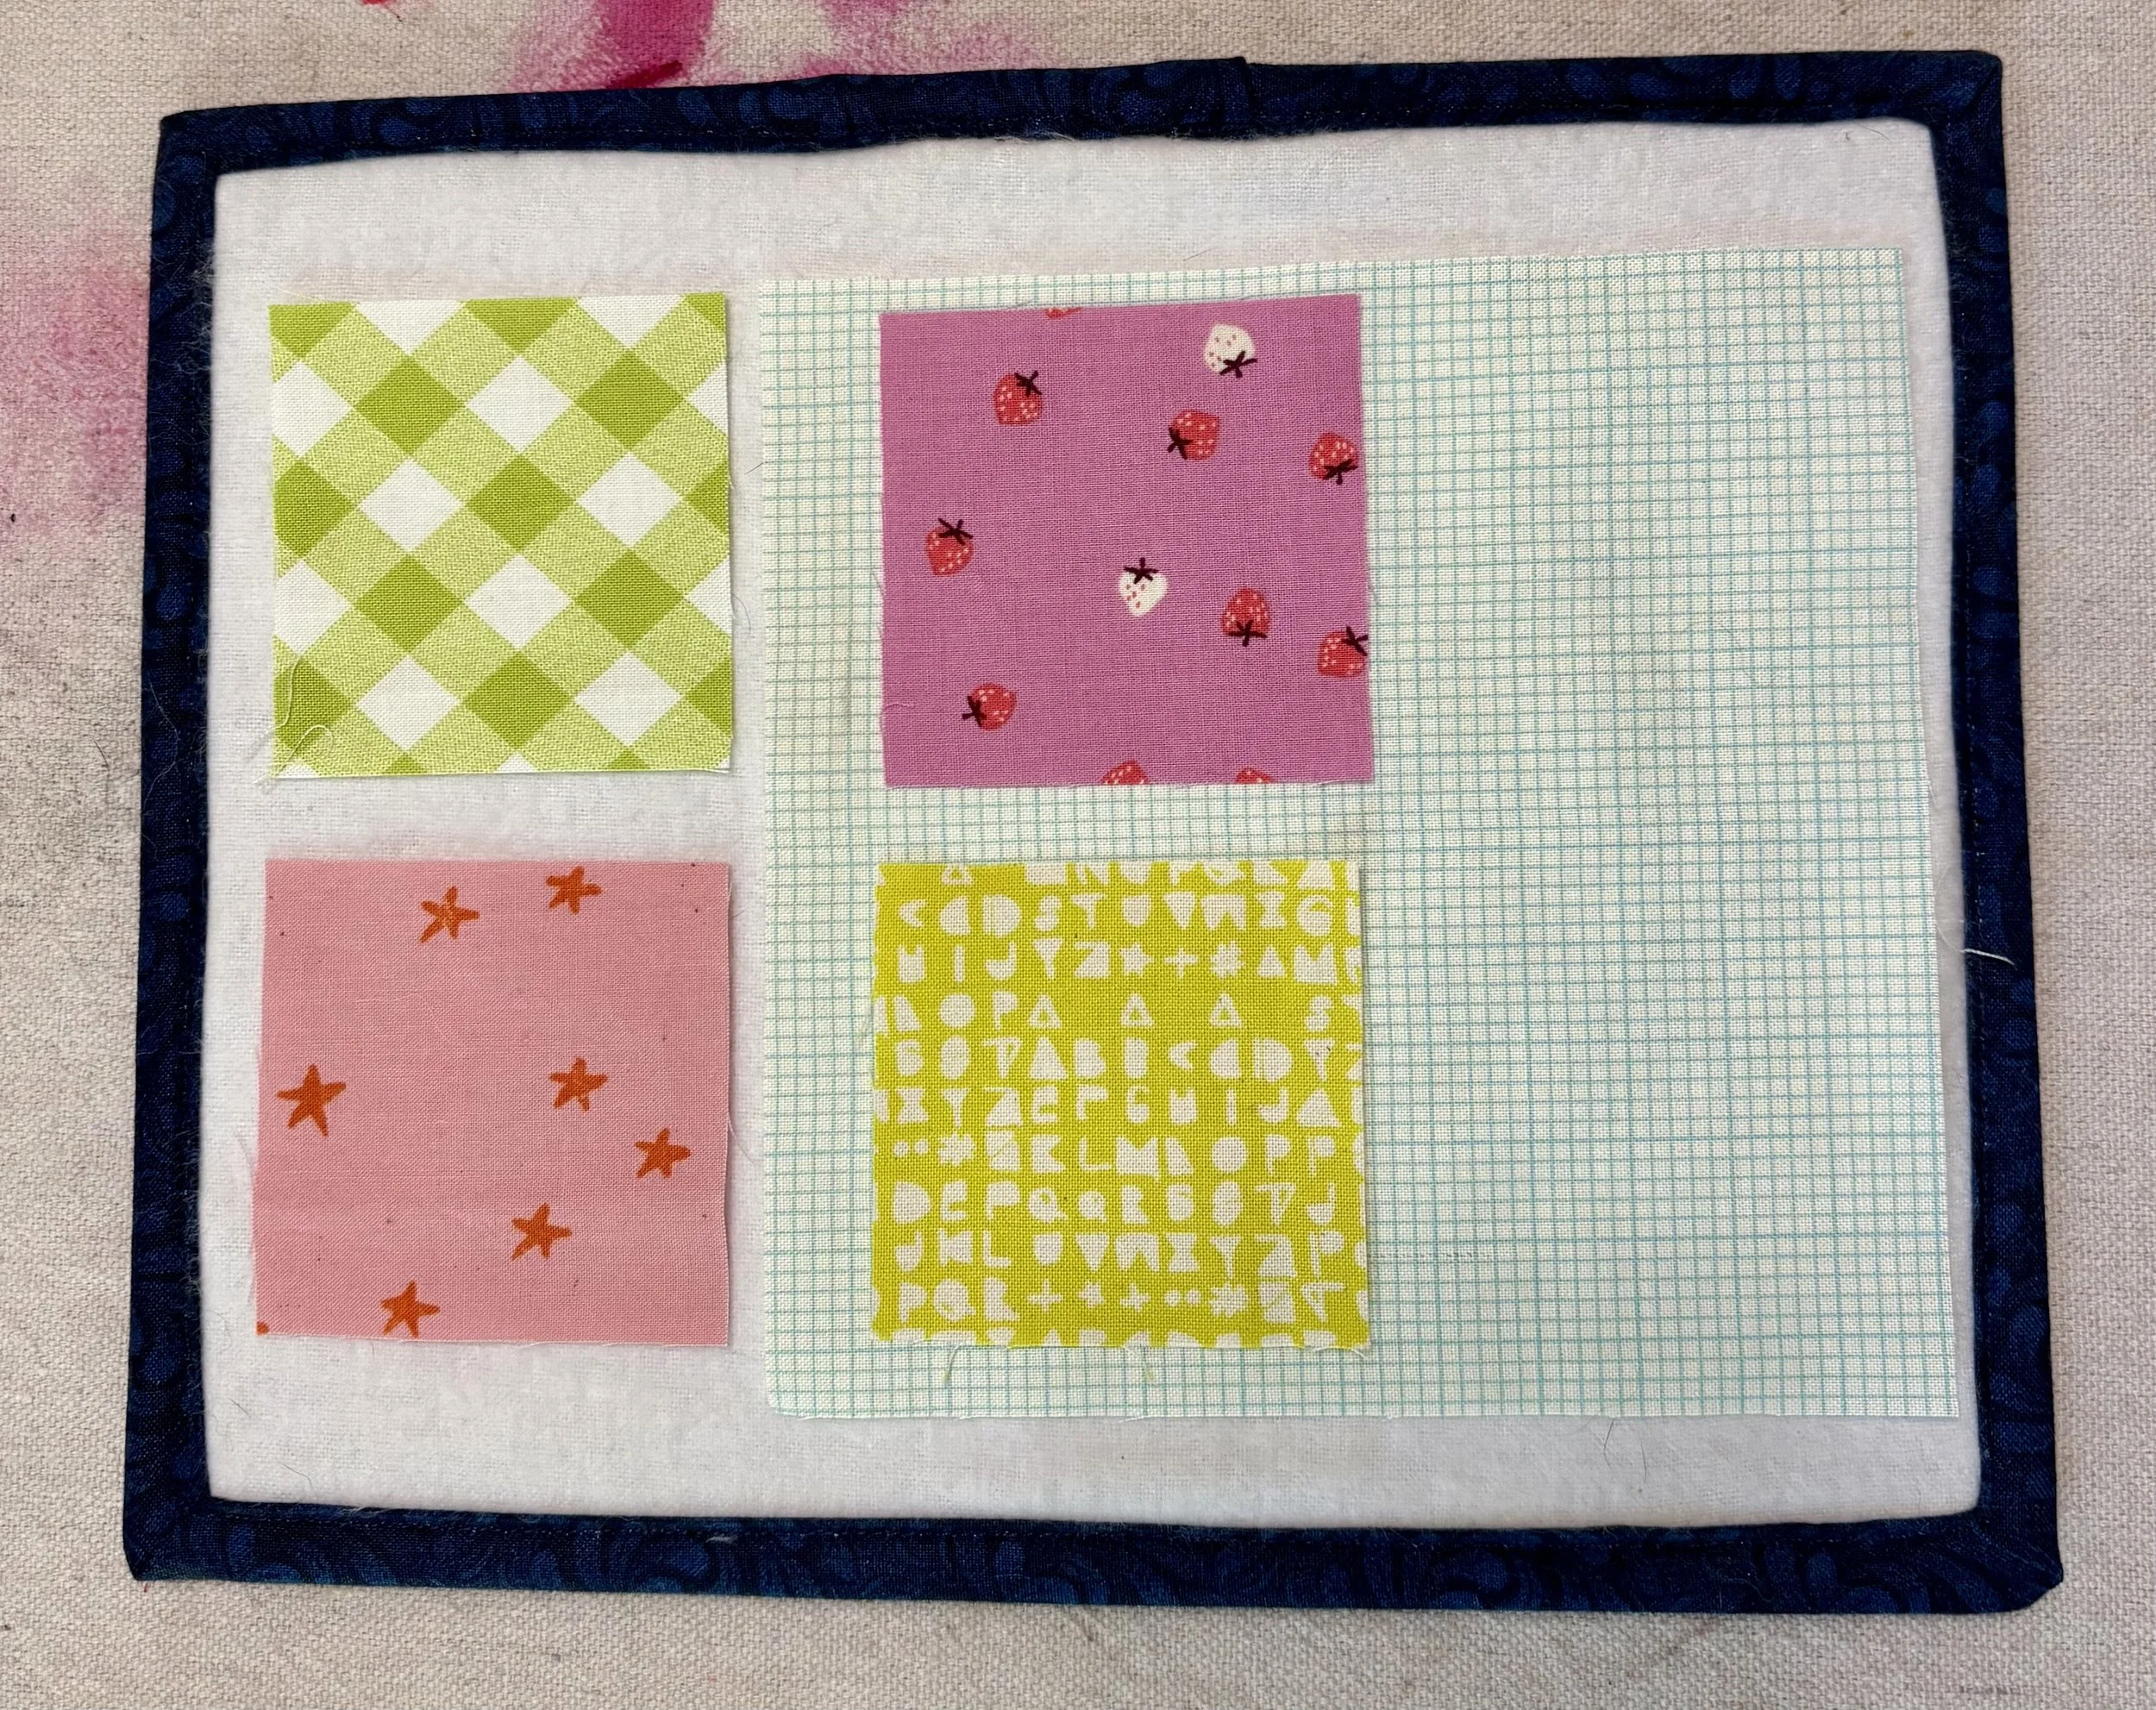
Start with (4) 2.5 inch x 2.5 inch focus fabric squares and a 6 inch x 6 inch background square.

Use your Iron to press the focus fabric block in half diagonally (right sides together).
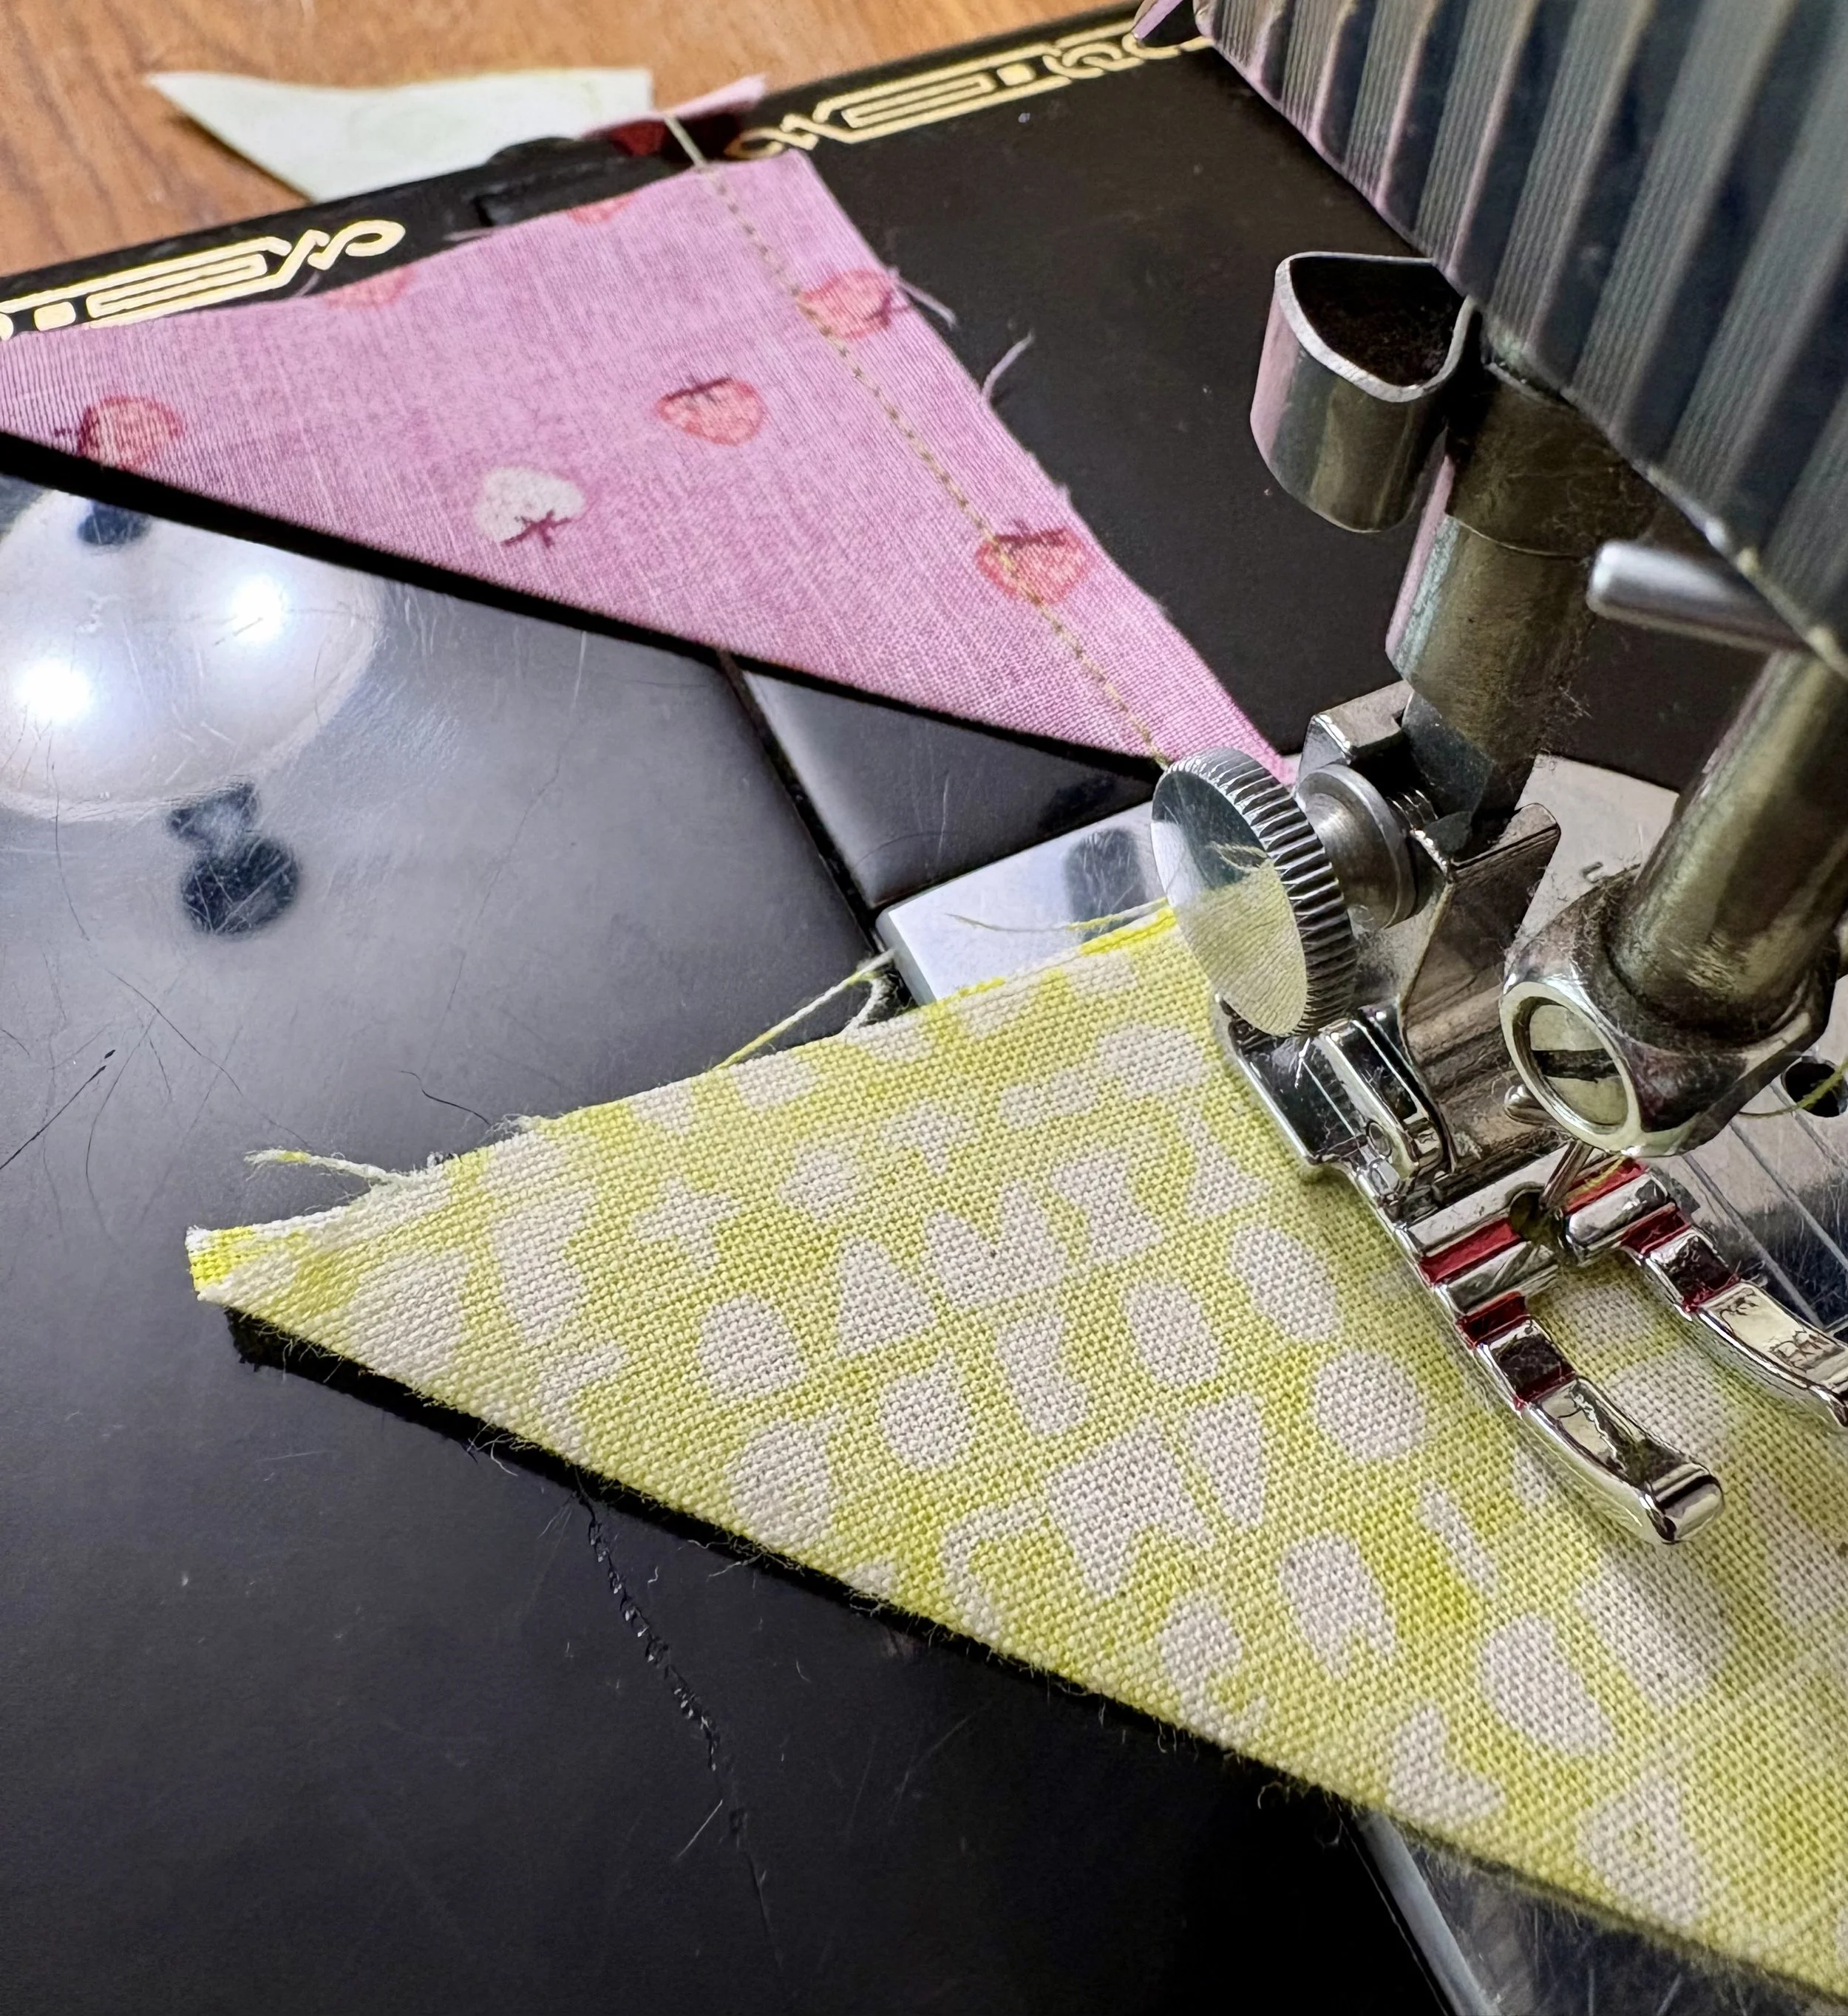
Stitch down one of the short sides of all the folded squares with a ¼ inch seam.
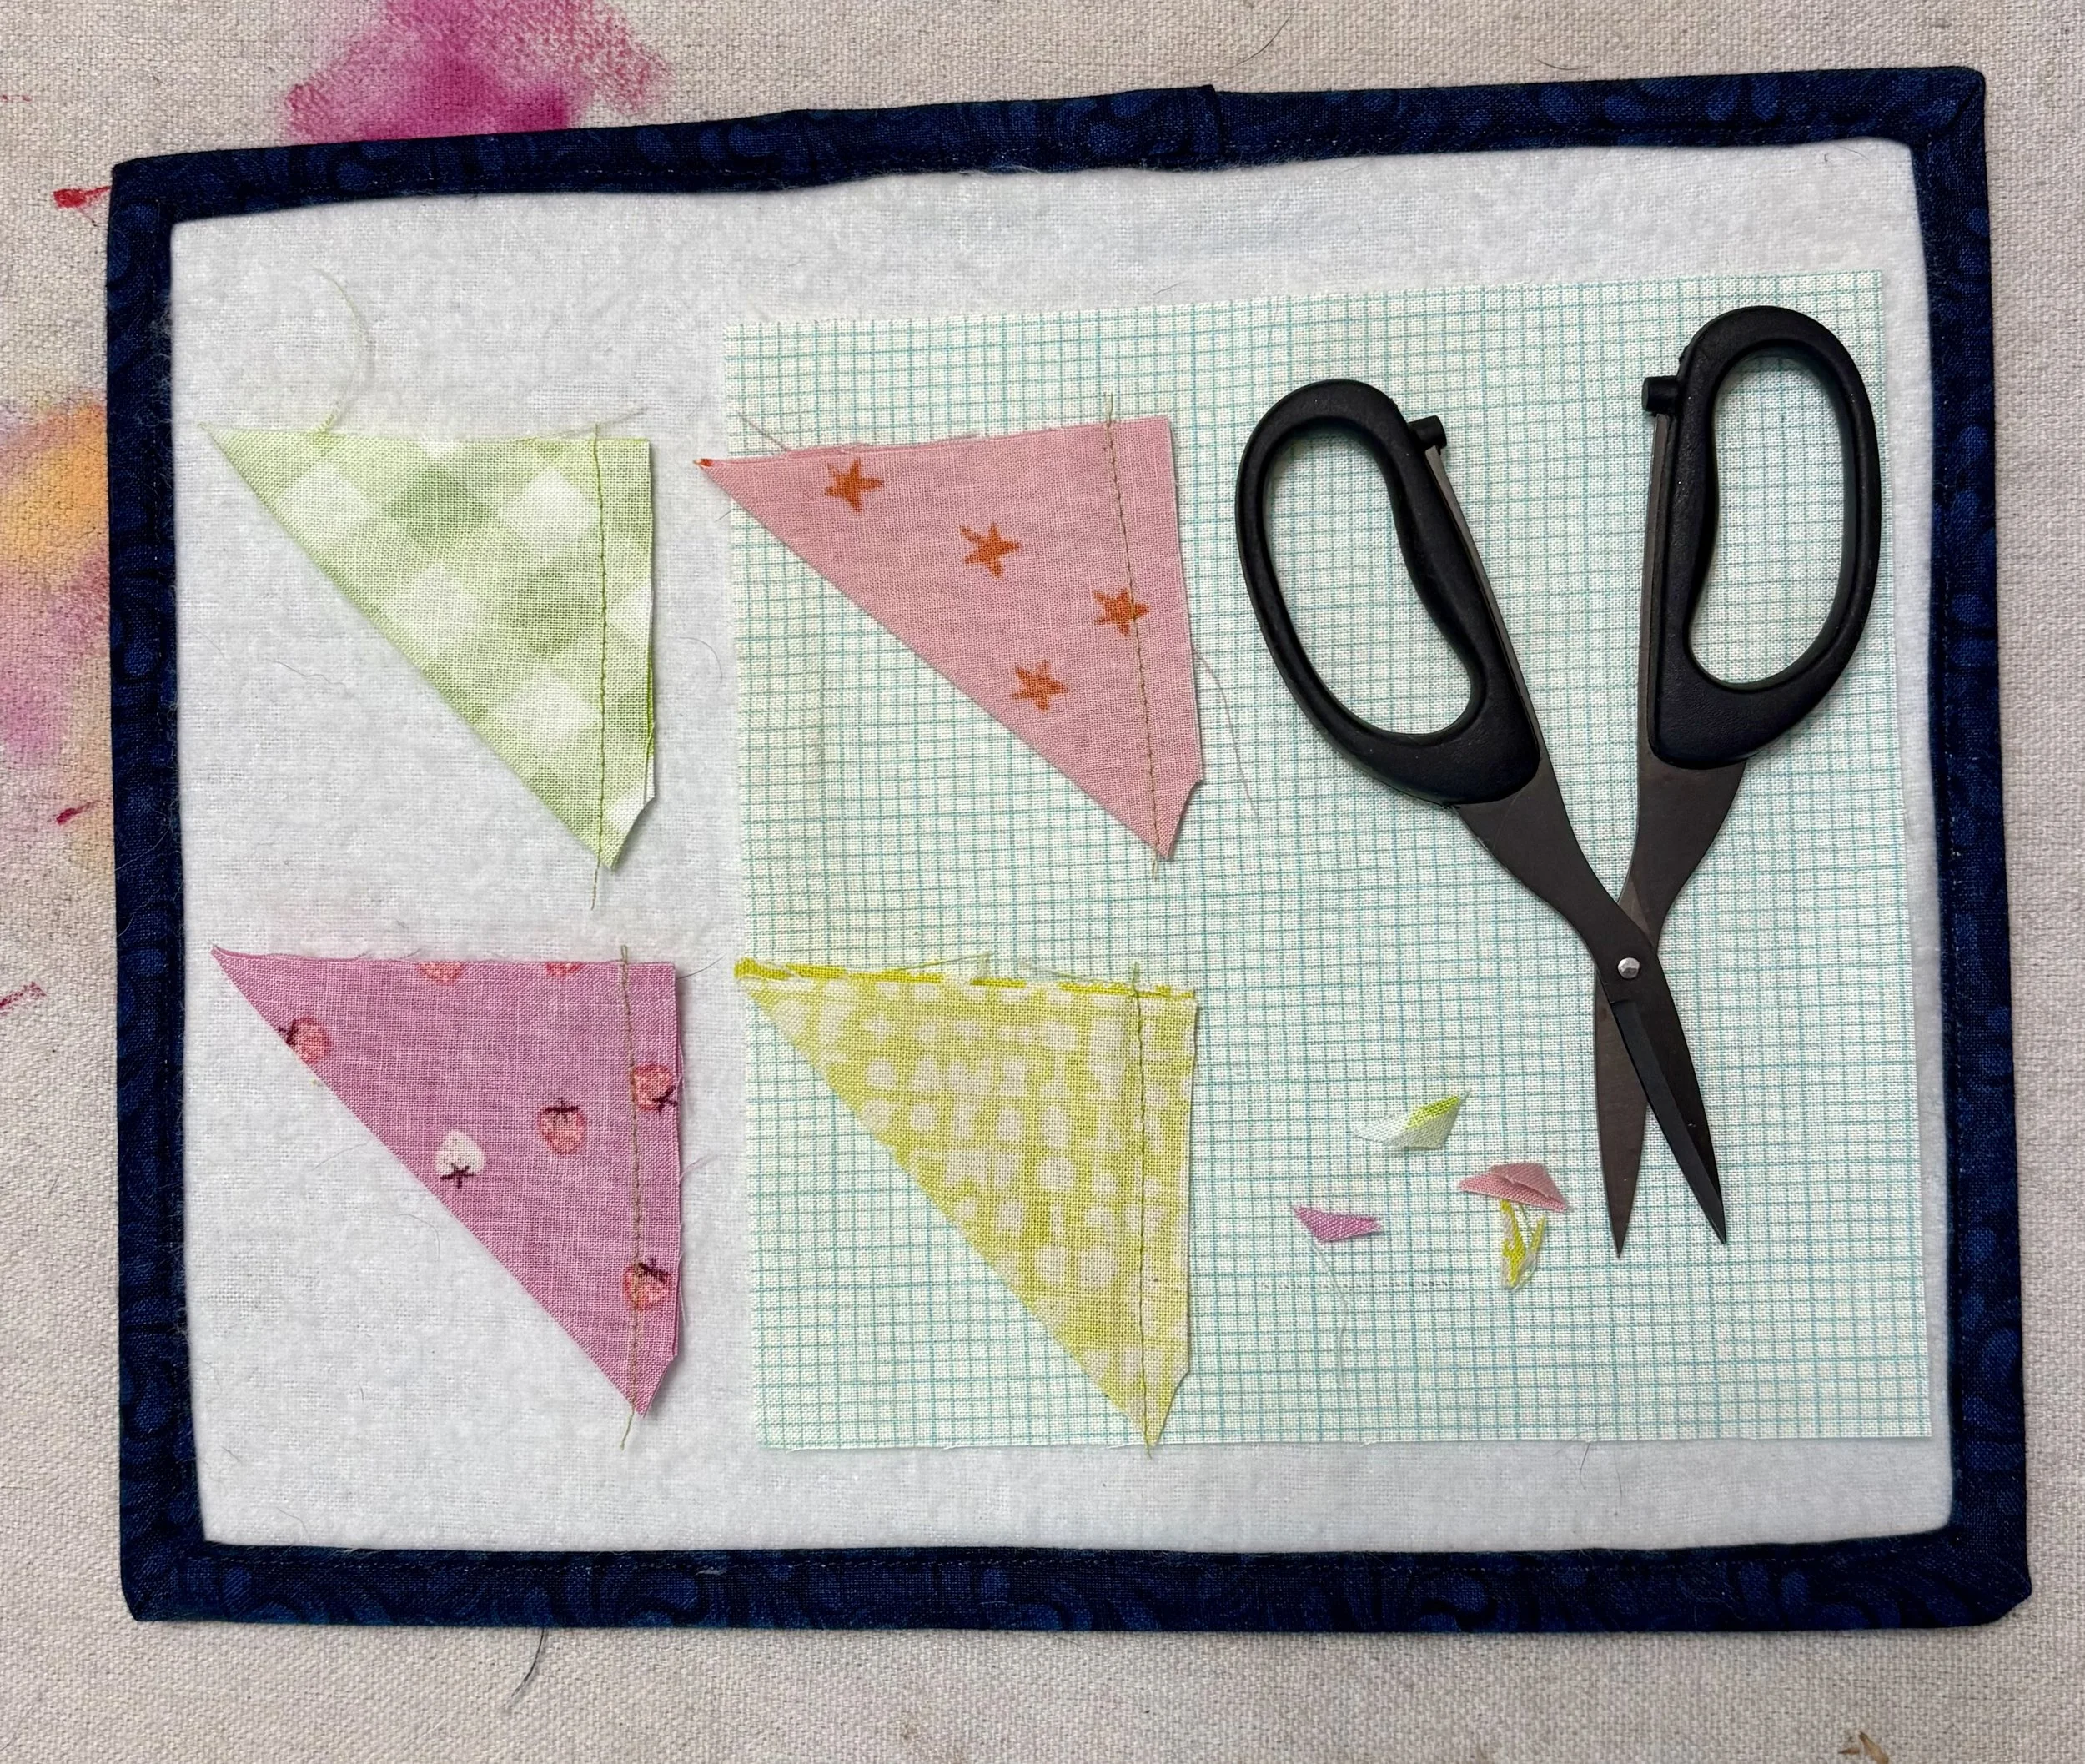
Clip off the corner tips. This makes it easier to flip them inside out and makes the points less bulky.
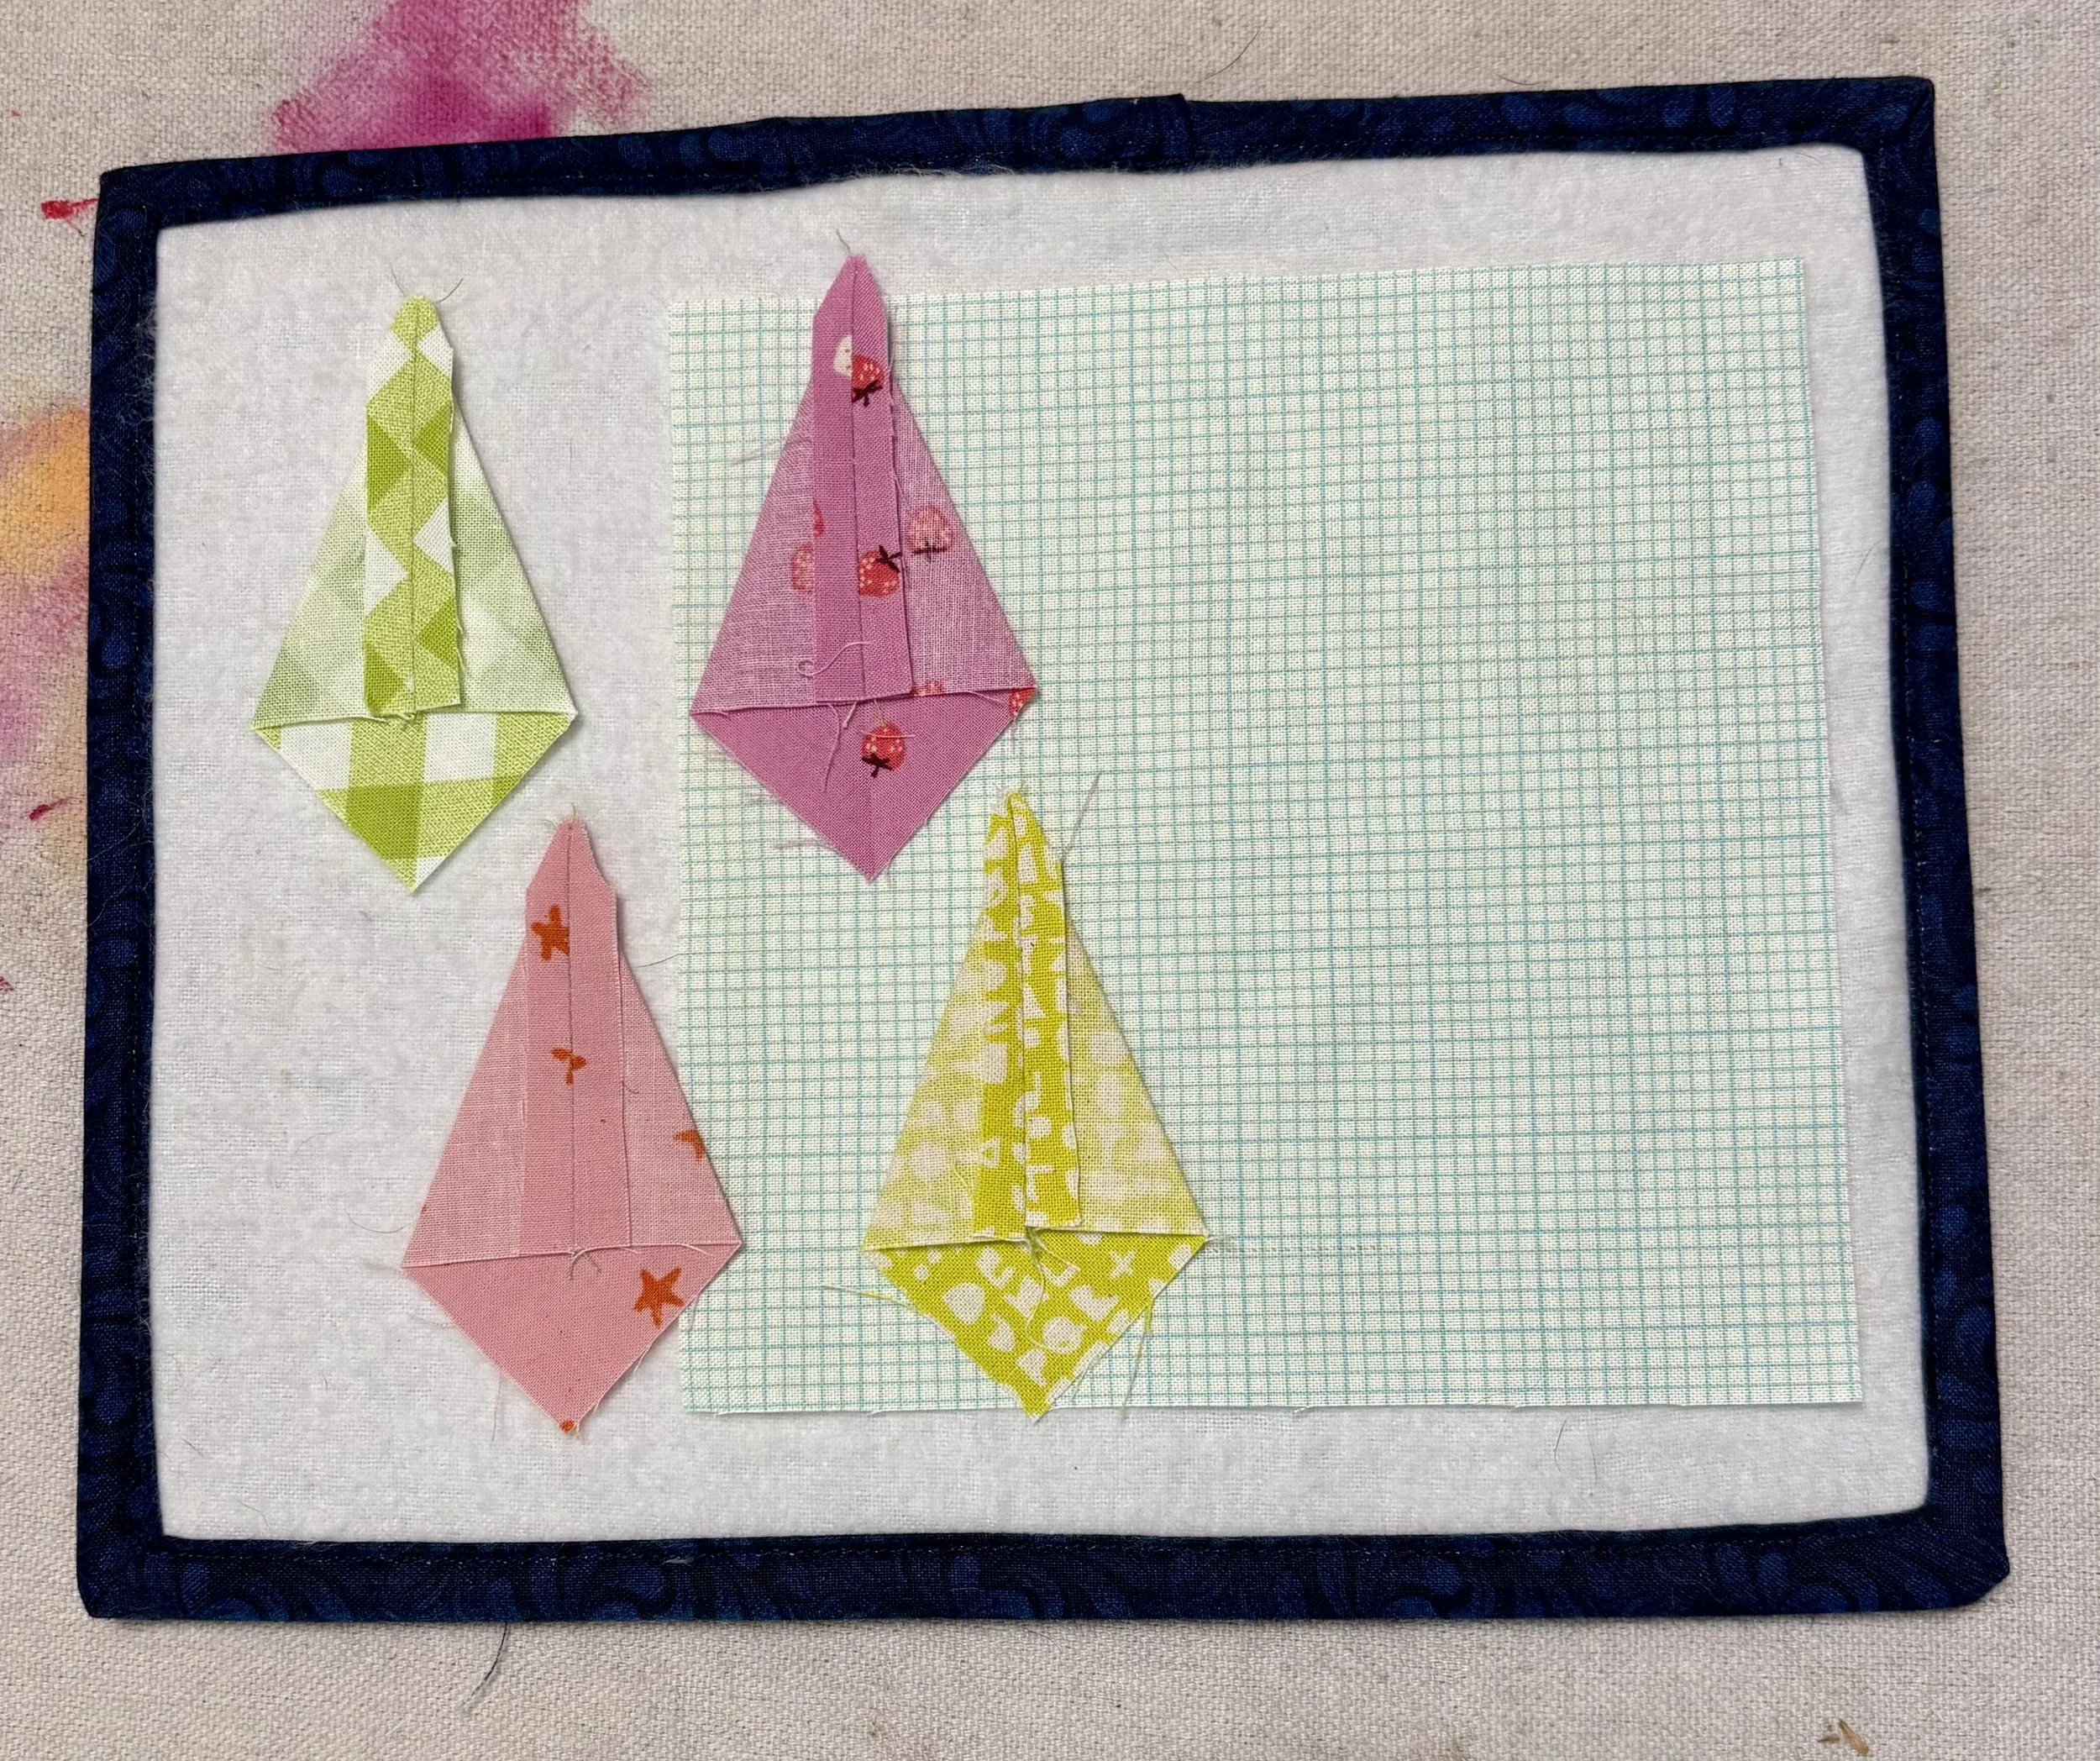
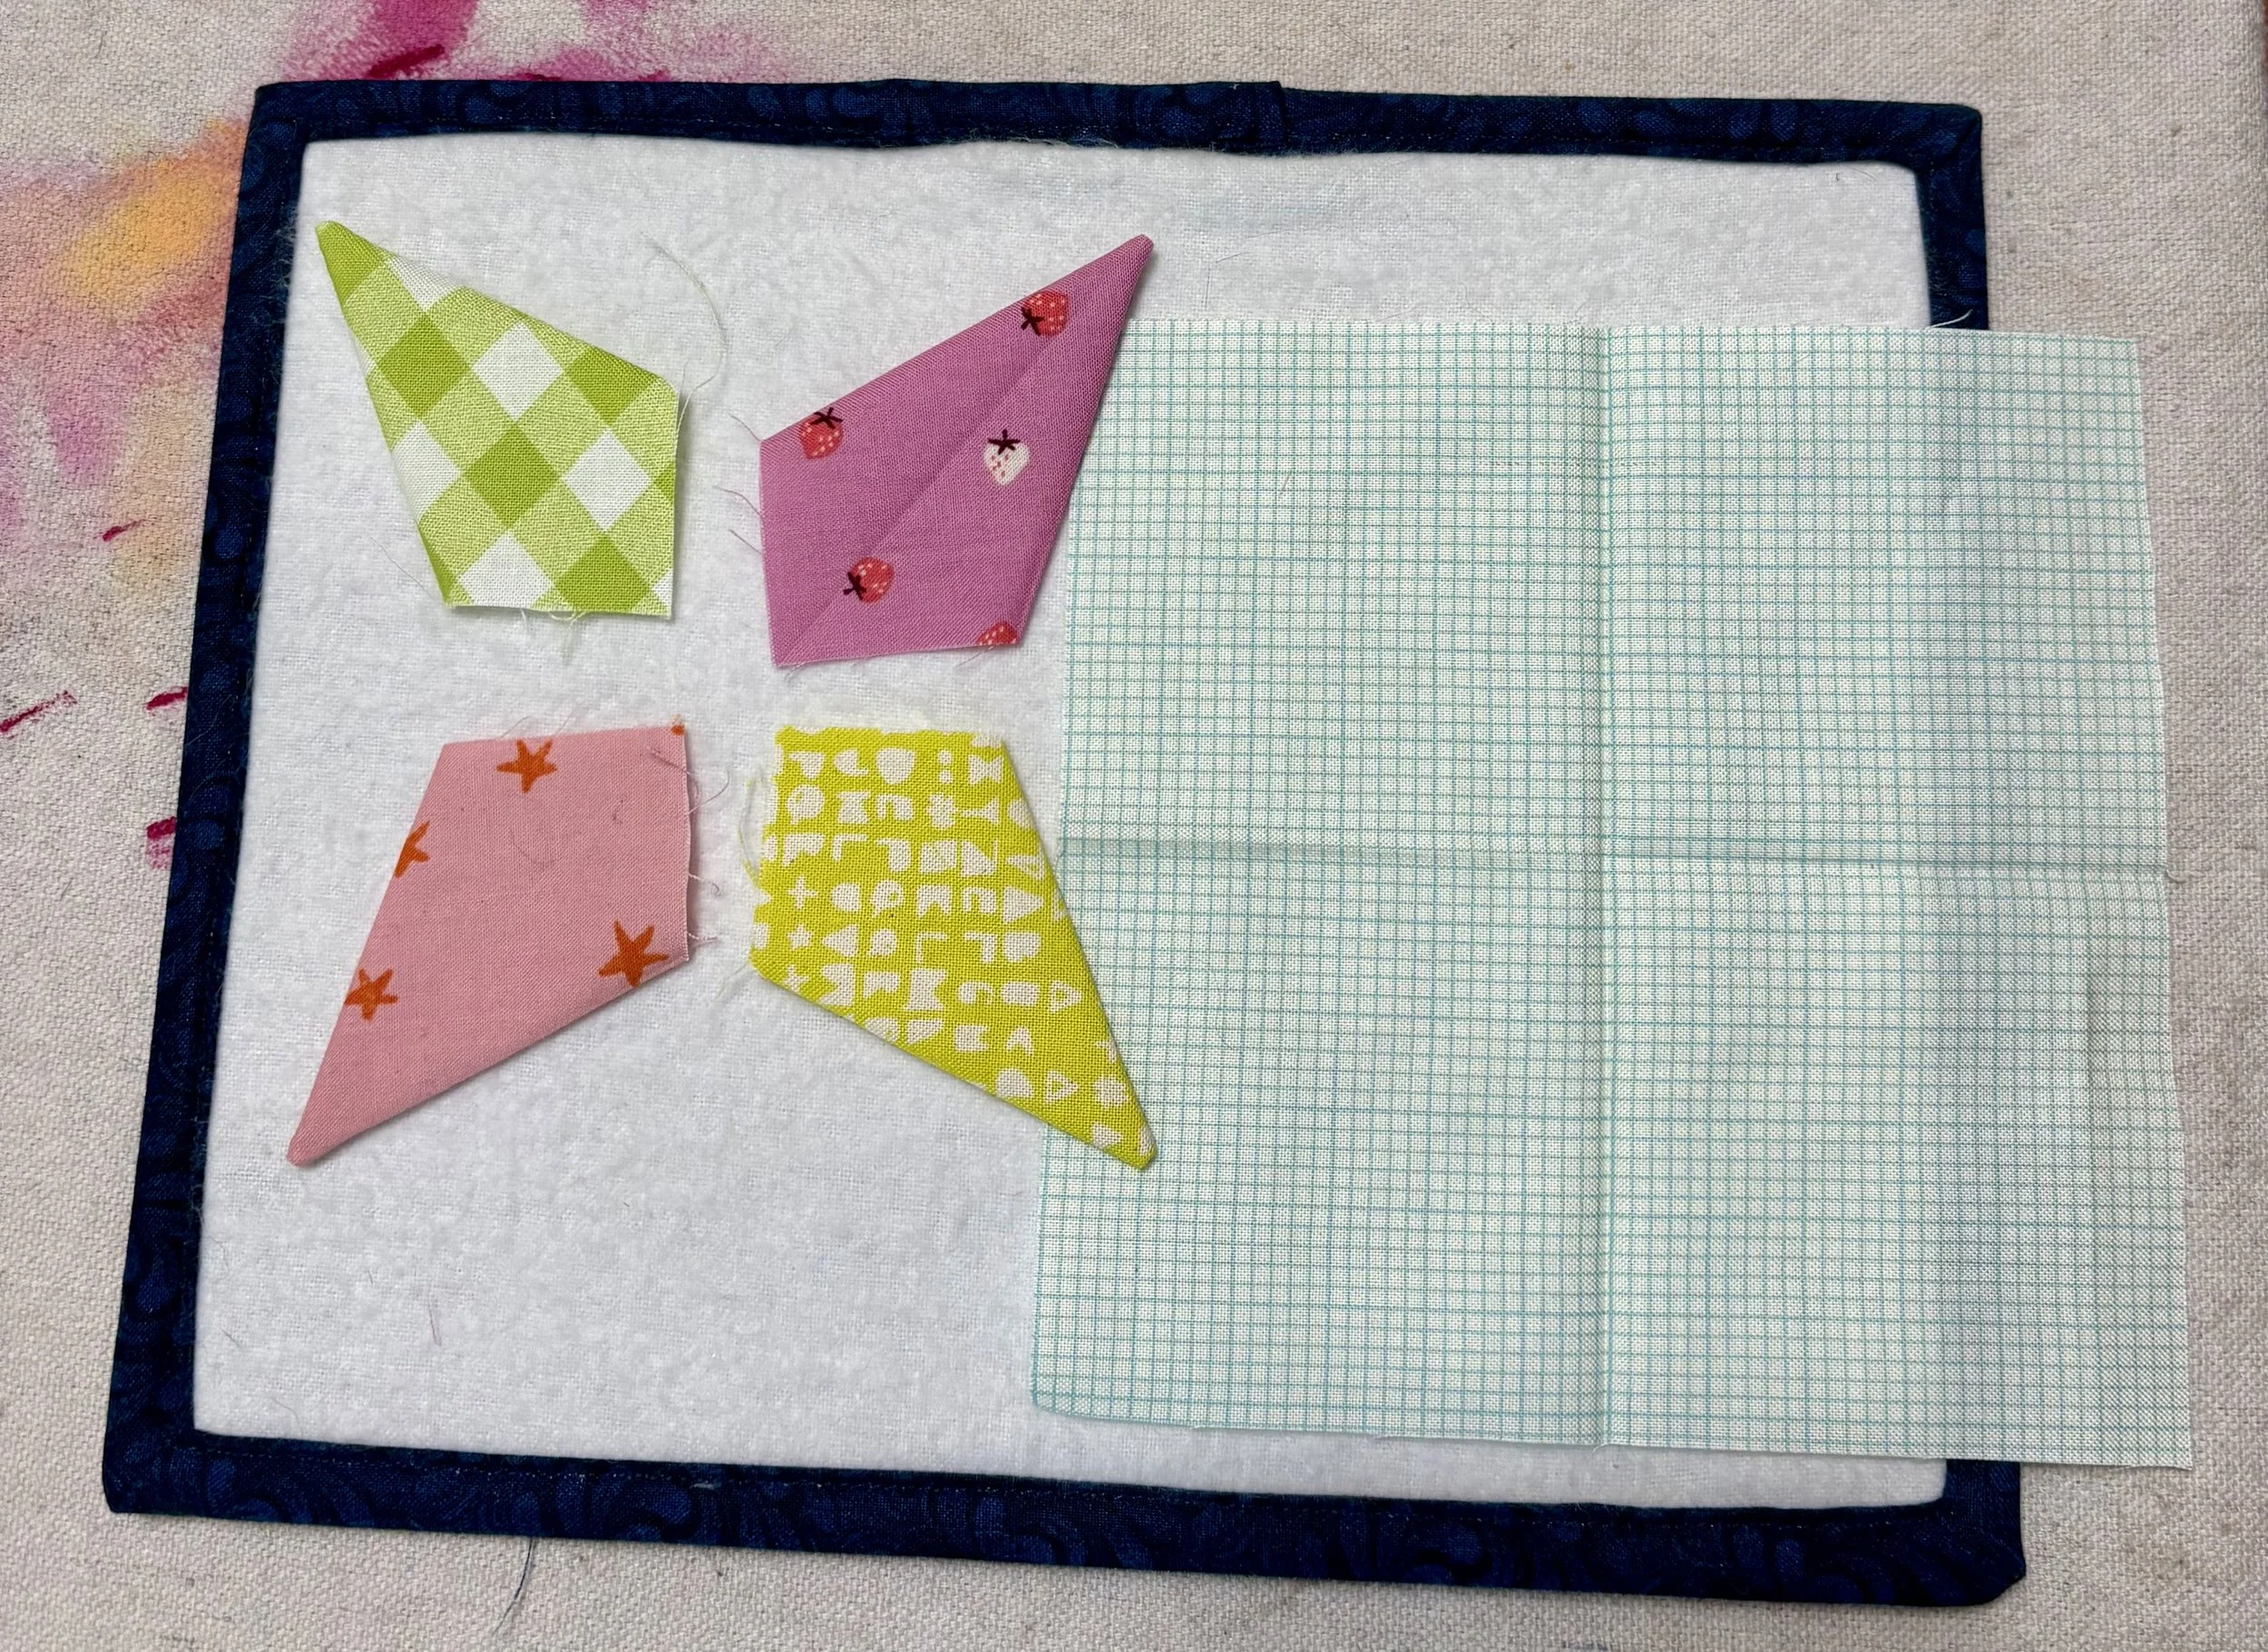
Use your iron to press the triangles into kite shapes while they are still inside out.
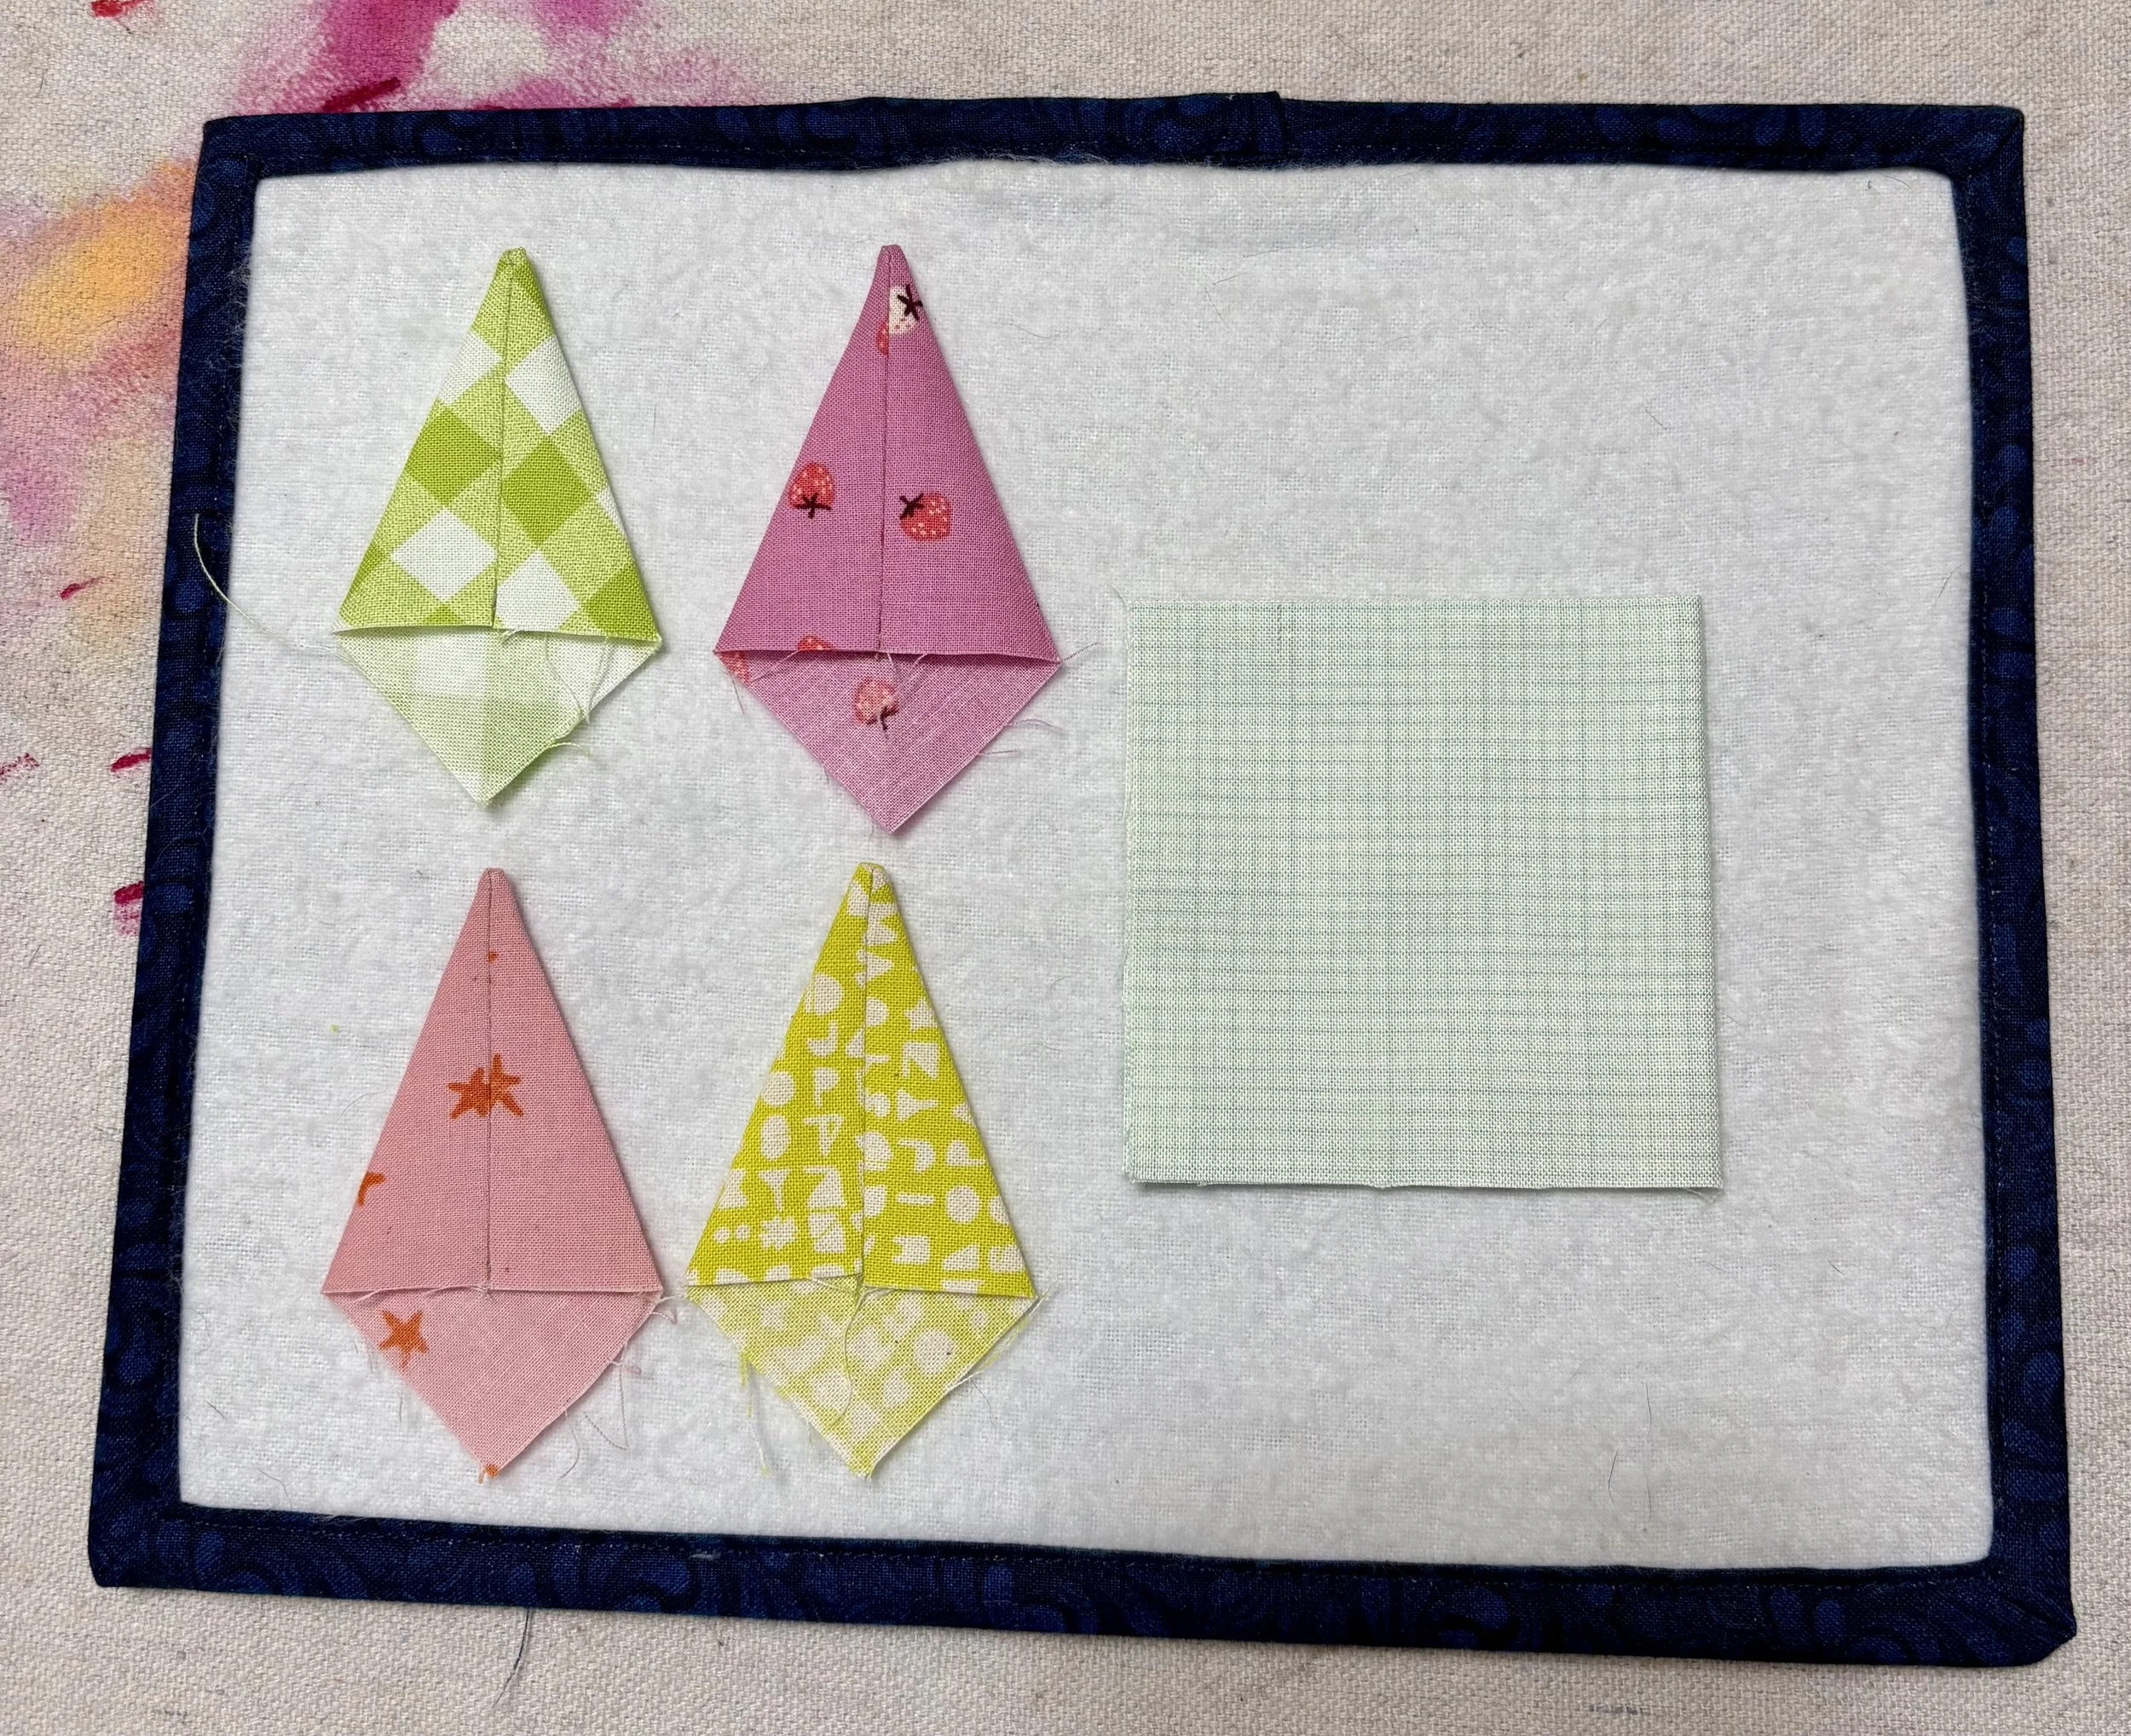
Turn the kite shapes right side out and press again. This can be the most fiddly step. I use a knitting needle to ease the points out. I also go ahead and press the background in half twice so I can easily find the center of the background.
Sew the kites together like a four patch block. Use a ¼ inch seam. Press the seam allowance like you like.
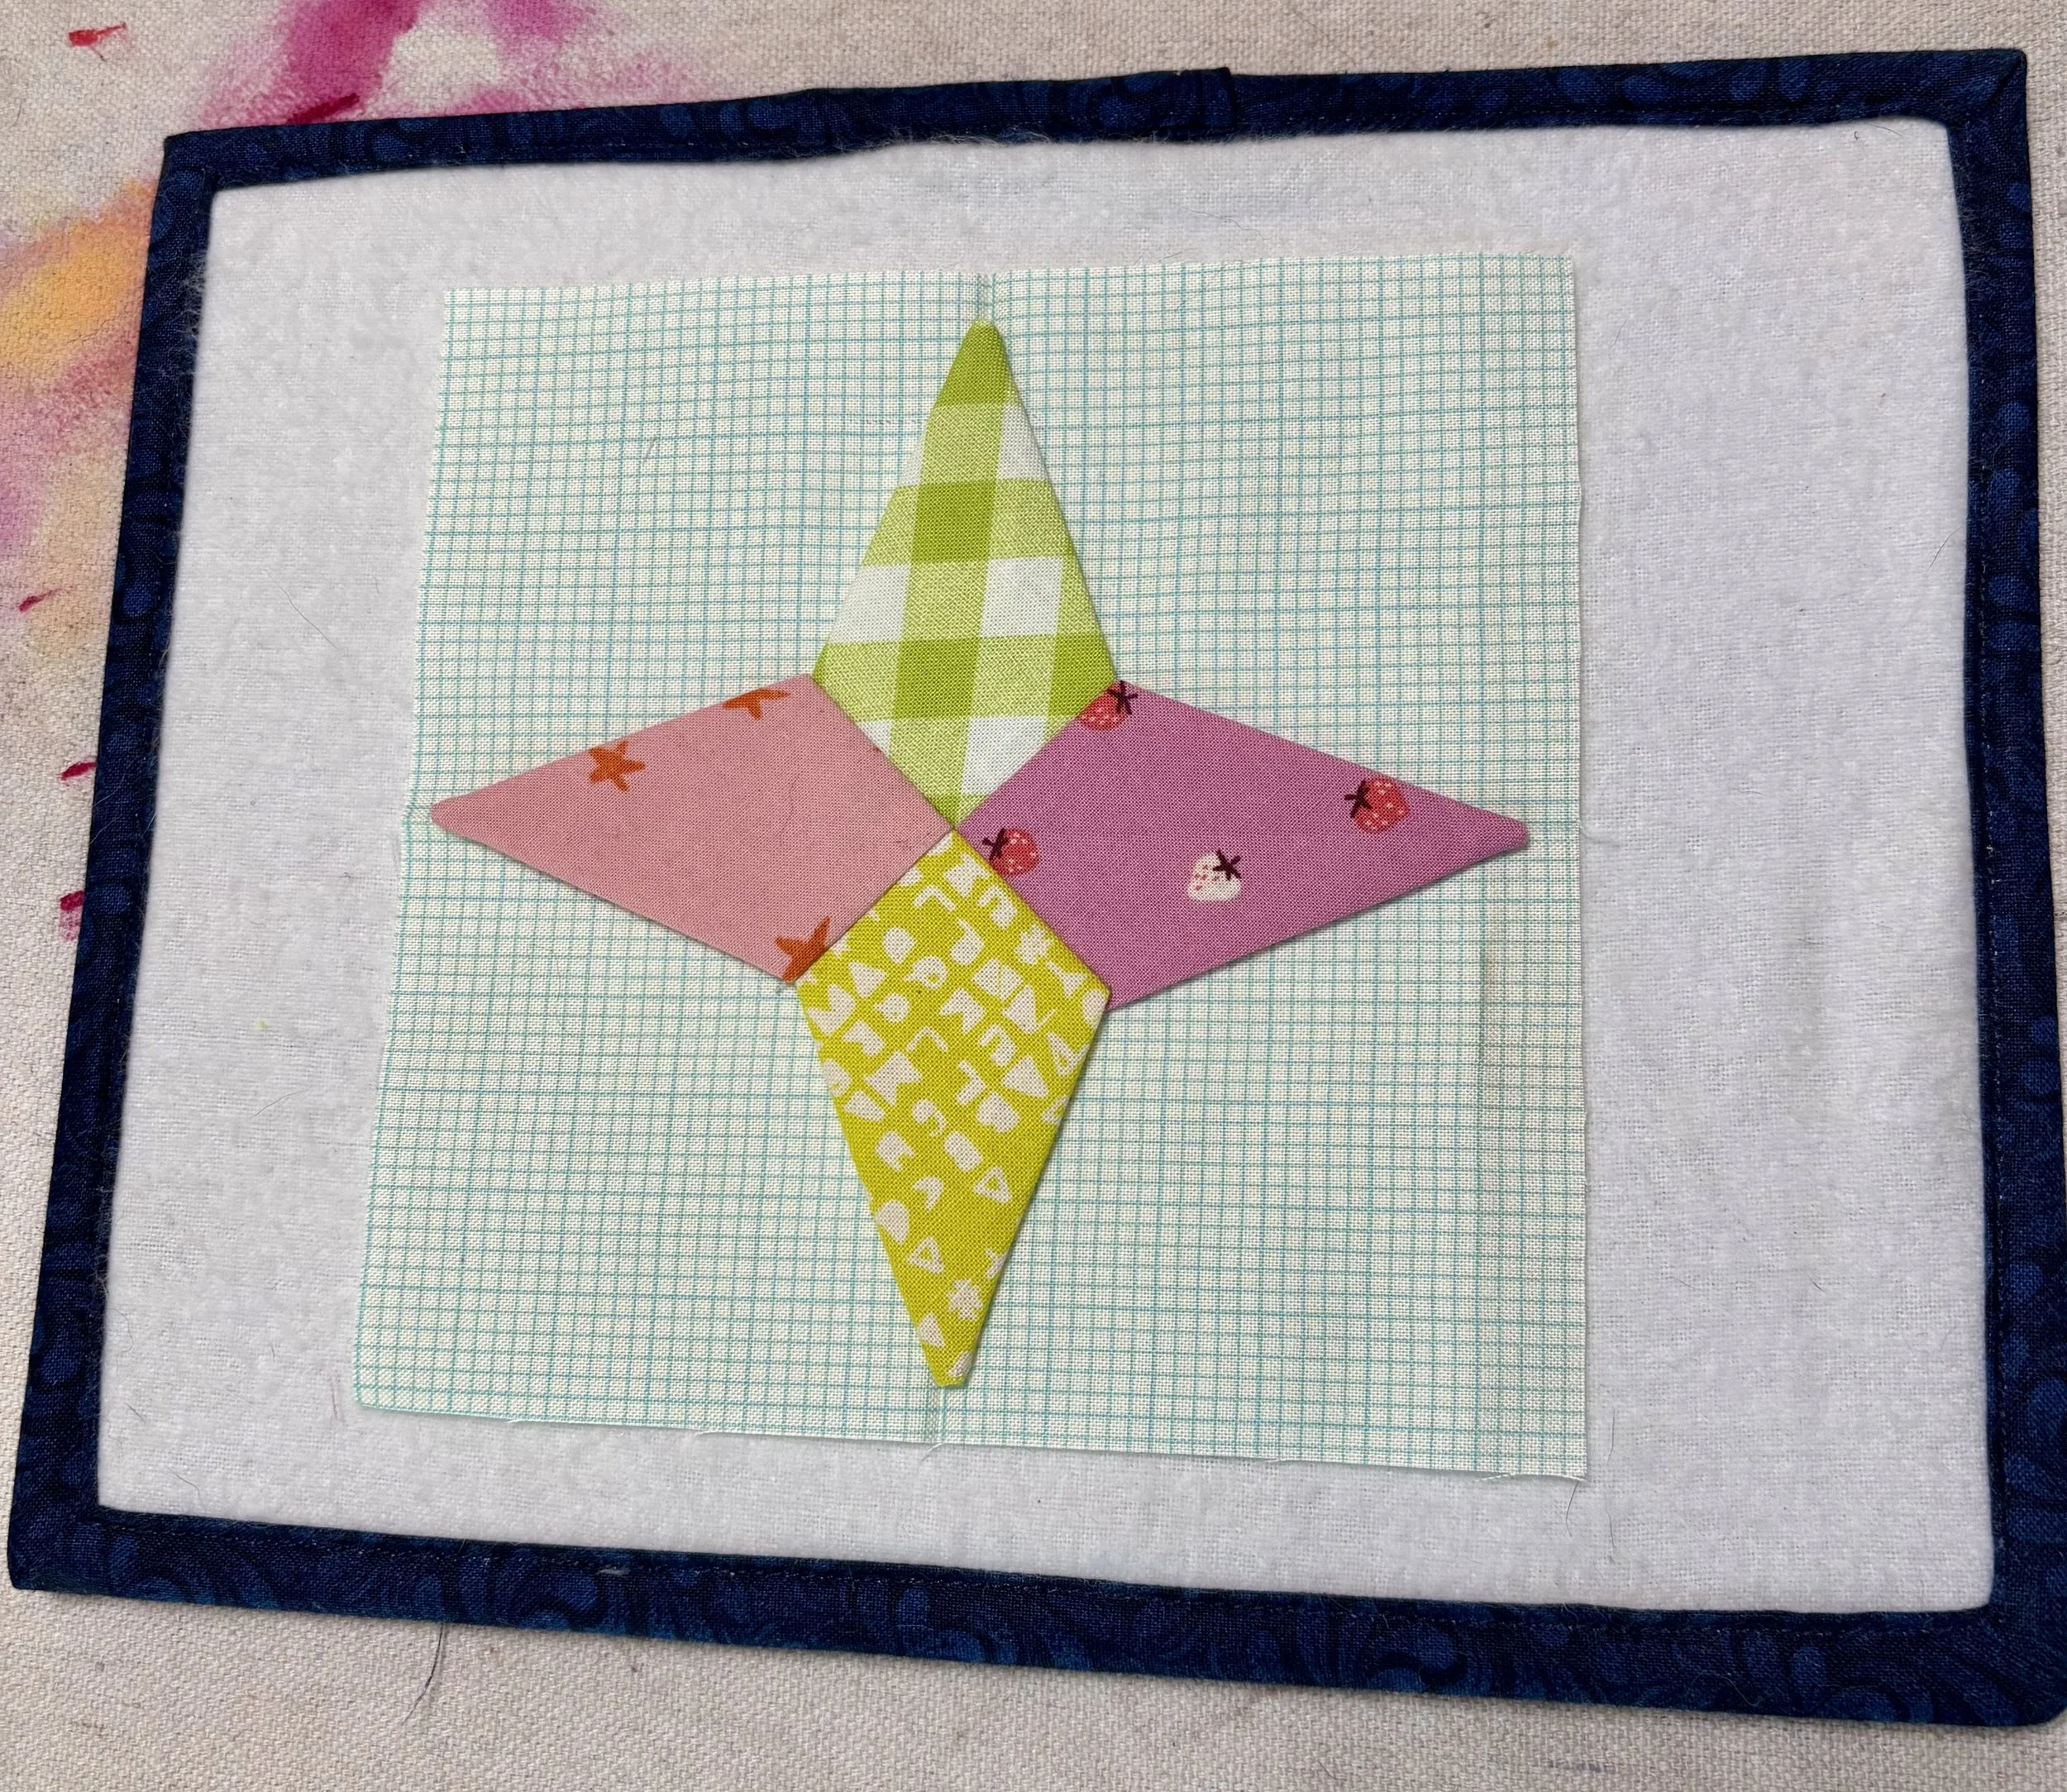
Position your cute little Periwinkle block in the center of your background and stitch it down however you see fit. I like to just hand sew them with a simple little whip stitch, but you can top stitch or zig zag them with your sewing machine. Make lots and you will have a quilt top in no time. I think these would also make a really cute quilt border.
What do you think? Will you try these blocks?